- Published on
Getting to know the Atari 8-bit again
Introduction
The Atari 8-bit machines are wonderful creations. My first introduction was a 800XL in 1984.
Standing in our local electronics shop and looking at all the colours and hearing the beeps and bobs coming from a two tone box and the connected TV was awe inspiring. A clear upgrade from the VIC-20 I had.
Tentatively asking the sales person if I could play something on the machine which was answered with: “Sorry we have no games but here are the manuals”
As it turns out growing up in a small town stuck between the sea and the Namib desert was a good thing. I’ll be forever grateful to the owner of the shop that put me on the path of wonder and creation. With the books in hand a plenty of time some intrepid friends and I started typing in code and learning BASIC. The creations were wonderful and mind blowing, at least to our young minds at the time. Something as simple as:
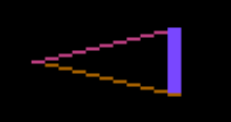
10 GRAPHICS 11
20 COLOR 1
30 PLOT 10,10
40 DRAWTO 20,20
50 COLOR 6
60 DRAWTO 20,0
70 COLOR 3
80 DRAWTO 10,10
90 GOTO 90
which would produce this triangle:
Changing parameter and learning new commands were wetting my appetite for more. I guess never being at home anymore caused my parents to bite the bullet and purchase an Atari 800XL with 1010 tape recorder. Little did they know what was to come. Soon the 1050 disk drive followed and then a bit later the Atari 130XE. I got my own monitor and the familiy TV was available to others again.
I still have my 130XE, though today I mostly use the Altirra emulator.
Today
After visiting a friend’s Atari museum and reliving all the old memories (with a modern perspective) of low resolution graphics, square wave sounds, long loading times and hours of fun coding in BASIC and assembler it was time to relearn this old technology. I had played with various emulators over the years but soon settled on Altirra as my prefered emulator. As with most things in life things are not as simple as the package makes it out to be. To run most games or other programs in Altirra you need to find the original ROM images that made the old hardware tick. Following these steps will get you a running system:
- Download Altirra (use version 3.90)
- Extract the zip file to an easy to reach location: i.e
D:\Altirra - Now its time to find the BIOS ROMS from the original Atari machines
- Download PC Xformer Classic 3.8
- Copy the
ATARIBAS.ROM,ATARIOSB.ROMandATARIXL.ROMfrom that zip file into your Altirra folder
- Run
Altirra64.exe- It will go into a setup phase. Click
Next >on the welcome screen - Now its looking for the firmware ROMs. Those are the ones we just copied from the PC Xformer zip file
- Click the
Scan folder for firmware images ...button and select the folder where Altirra is installed - It should tell you that it found three firmwares
- Click the
- Click
Next >until you come to the video standard type selection- NTSC is used for US software
- PAL for European software
- It makes no difference which you select now. It can always be changed later
- Click
Next >once you've selected you video system
- Streamlined or Authentic, well we want to code and not wait forever, let go with
Streamlined - Click
Finishand the emulator is running - One more important step is to select the
Inputoption from the menu- and click
Input Mappings...- Now we can select which type of input device should emulate a connected joystick Today we use a mouse and controllers, but in those days we used joysticks
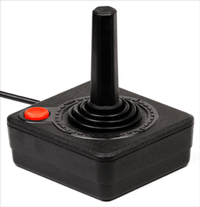
- For now select the first options
Arrow keys -> Joystick (port 1). This will map the four arrow keys to the joystick direction and the leftControlkey is the fire button.
- and click
- It will go into a setup phase. Click
Now you should see a SELF TEST screeen. Atari added this little feature to test the hardware by including a small test program in the ROMs. If you are like me and instictilve grab the mouse to click on something well you are in good company but we have to think back 30+ years. The Atari computers came with some special function keys, much like we have F1 - F12 today. They were START, SELECT, OPTION AND RESET
- START is mapped to the F2 key and is used to kick off an action in games or applications. You will see messages like
START TO PLAY. That is one thing to get used to: EVERYTHING IS IN CAPITAL LETTERS. - SELECT is mapped to the F3 key
- OPTION is mapped to the F4 key
In the SELF TEST screen pressing SELECT will change the test case selection. Press SELECT/F2 until the AUDIO-VISUAL option is selected,
then press START/F2. Welcome to you first low resolution, square wave sound audio-visual presentation. We are back in the 80s now.
One other important key is the RESET key (mapped to F5). On old hardware with a very basic operating system and most things running
directly from ROMs a reset was quick and safe. Something that has gone totally out of fashion is the COLD RESET (Shift-F5), this emulates
you turning off the power and turning it back on. We don't cold reboot our machines, they sleep or hybernate but very seldom do we have to
turn off and on. Well in those days is was normal. Click-Click and you are booting from disc or find your self in BASIC.
That is our next target. Press the RESET key (F5) (also called a warm reset, because you are not turning the power off). You should see a blue screen with the word READY, much like this:

Welcome to Atari BASIC. You are welcome to explore the BASIC realm by typing in the listing above. Once having typed in the 9 lines of code, type RUN and hit the enter key and marvel at the graphics. Hitting BREAK/F7 will return you to BASIC. If you hit RESET/(F5) and type LIST and hit the enter key you will notice that your program is still there. A cold reset will dump you back in the self test screen.
Doing stuff in BASIC is no fun. I wanted to get back into assembler. I do have a copy of the ATMAS II assembler I used as a kid, but could not get myself to listen to the clicking sound and be limited to slow compilers/assemblers and disk swapping. I want to use VS Code and a modern tool chain to get my coding done.
Next we are going to setup some modern tools, write some assembler code and get it to run on the emulator.
Software
There is a HUGE library of software for the Atari machines. Check out Atari Mania or Atari 8 Bit Deluxe